Part 1: Preparation of the site
Assess the site where you wish to plant. Is it part of an undisturbed field? If so the clay will usually be ok. If it is a site where the soil has been dug out and replaced using heavy machinery there are likely to be problems of mixed soil quality, poorer drainage and soil compaction. It is always good practice to investigate further by digging out a hole 50cms deep and 50cms wide. If the drainage is ok the hole will fill during heavy rain and drain away over a few days. If you can dig out clay of a consistent brown colour to that depth without huge effort using a spade or a digging fork and a little pick axing then you are lucky and plants should thrive.
If you meet some stones which you can dig out that is ok, but if you hit solid rock you will need to have a minimum of 20cms clay over the rock to ensure that plants will grow. Usually where there is underlying rock or shale the drainage is excellent, and it is better to select hedge plants that are drought tolerant. If the hole is part filled with water all the time during a period of wet winter then you have a drainage problem and you need to either improve the drainage or select hedge plants from the ‘boggy’ list. Sometimes the underlying soil or pan will be the dreaded ‘clay bhuí’ (from the Irish=yellow clay) or ‘márla’, a sticky yellow or grey substance good only for making pottery. Different names in different parts of the country and your local ‘digger man’ is the best advisor about how to deal with it.
Drainage And Compaction Problems
The structure of clay that has been worked and driven on by heavy machinery in wet weather is often damaged and the clay will drain poorly if at all. Poor drainage will kill your plants so it needs to be rectified before planting.
How do you know if you have poor drainage?
- If the lawn area feels soft and you are sinking as you cut the grass.
- Water is visibly sitting on the ground after heavy rain.
- Plants have already died in that area.
- There are rushes or flag irises in the locality.
If you think the drainage might be poor investigate further by digging out a hole 50 cms deep and wide. If the drainage is ok the hole will fill during heavy rain and drain away over a few days.Poorly drained soils can be damaged by working in wet weather so it is better to wait for a dry spell. Adding lots of organic matter will help to improve the drainage as the earthworms dig tunnels through the soil.
Ground preparation and spraying
– Lining out and killing off the existing vegetation.
Place a line of twine or a builders’ line along the line of proposed hedge. At 30 cms either side of this line pin down two parallel lines. Using a watering can or budget, spray the area inside the lines with a systemic herbicide such as Gallup, Pride or Roundup. Add 250 mls of milk to the watering can or budget as it can be difficult to see where you have sprayed. Follow the instructions and try to ensure the grass will be dry for 4 hours after spraying to ensure an effective kill. The grass will start to die off changing from yellow to brown. After ten days there should be no visible green patches -if there are, you have missed a patch and do it again. You are now ready to plant.
Part 2: Planting the hedge
What to do when you receive your bare-root plants.
The plants will have arrived in a sealed bag which you should but in a cold shed. Better to plant these as soon as the weather allows but if you cannot, after two days you need to take the plants out of the bag and cover the roots completely (bottom parts of plants) with damp compost or sand. If the plants are packed with straw keep the straw for mulching. Traditionally bare root plants are ‘heeled-in’ by placing them upright in a shallow trench and covering the roots completely with clay or sand.
It is vital that
a) the roots do not dry out and are not exposed to frost
b) the roots are not drowned in poorly drained clay.
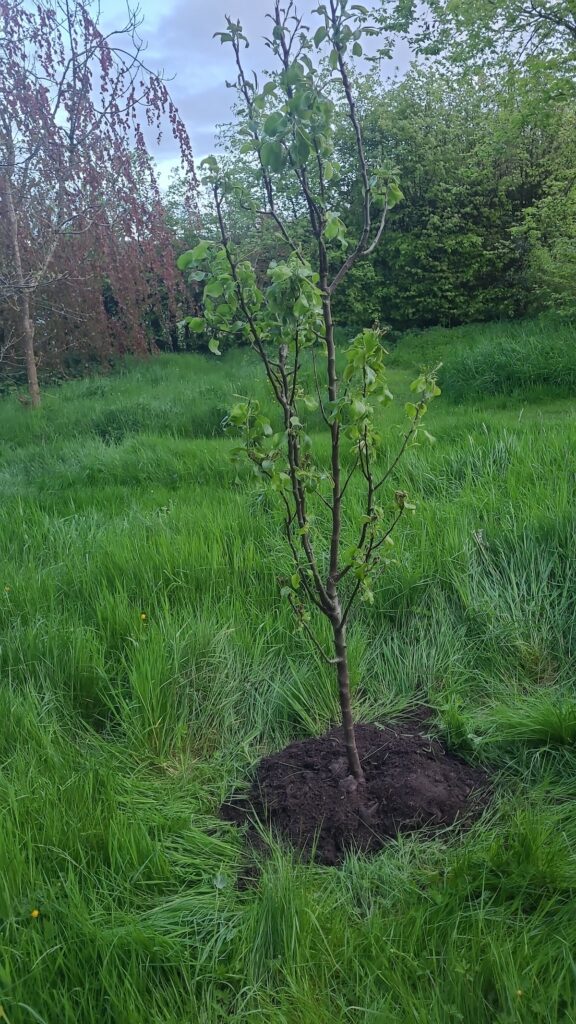
Planting the bare root plants.
If the ground is not frozen you may plant. Cut a stick 50cms long if each plant is to be planted 50cms apart (or 30cms long if each plant is to be 30cms apart).
Take a bundle of plants out of the plastic bag and put the roots into a barrel or bucket of water near where you are planting.
Leave them soak and only take them as you are planting.
Dig a hole a little bigger than the opened out roots of the plant you wish to plant. Remove the clay (two or three spade fulls should be enough) and put into a bucket or wheelbarrow. Break it up so that it is nice and loose and remove any large stones.
Remove a few plants from the water bucket. Place a plant in the first hole making sure that the root is slightly below the ground level. Use a few handfuls of nice soft clay (or compost if you are unsure about the quality of the clay) from the wheelbarrow to place around the roots and stabilise the plant. Dig the next hole 50cms further on using the cut stick to measure from hole centre to centre. Use the clay from the second hole to backfill the first, removing if necessary any large stones. Make sure the plant is at a 90 degree angle to the ground. Firm the clay gently with your boot around the plant and move on.
Planting potted plants.
The procedure for planting potted plants is identical to planting bare root plants. Soak the pots in water for a couple of hours. Dig a hole twice as big as the root of the plant you are planting. Remove the plant from the plastic container and proceed as above.
Part 3: Weed control, Organic and Non-Organic Mulches
Weed Control – Organic Mulches.
An organic mulch is material used around the base of plants which smothers weed seedlings and provides nutrients to the growing plants as it is broken down by soil organisms. Examples of organic mulches are grass clippings, cardboard, newspaper, seaweeds and animal manure. After planting it is important to stop the weeds growing. Weeds will compete (and often win) with the hedge plants for nutrients and water. The simplest and cheapest way to keep the hedge weed free is to smother the emerging weed seedlings with grass clippings, bark mulch, newspaper or cardboard.
Grass Mulches
Mow the grass and place the fresh lawn clippings to a depth of 10cms about 30cms either side of the new hedge. Top up the mulch three or four times a year taking care to smother any grass or weed poking its head through. Be careful not to add too much grass or it will turn into a slimy heap. Better to mulch after heavy rain as the grass can act like an umbrella and starve the ground of water.
Cardboard and newspaper mulches
Cardboard or newspaper can be used to supress weed growth. Using a heavy cardboard, place alongside the newly planted hedge and cut deep grooves which will allow it to be pulled around the plants.
Bark Mulch
Bark mulch is a decorative, effective and more expensive option. Bark mulch placed around plants to a depth of ten centimetres is very effective and while it will blow away when dried out on a windy site, one application is usually enough to help the hedge to establish well. Breaking down timber uses a lot of nitrogen so you may need to liquid feed the plants once or twice with a commercial or home brewed mix.
Animal Manures
The grand old master of self-sufficiency John Seymour said ’that the waste that has passed through the animal stomach is far superior to any other plant food’ so if you are fortunate enough to be able to access straw based animal manure you will have healthy hedges. Just use like grass clippings and don’t worry about it being too fresh. As long as it is animal bedding it will be fine but do not use undiluted slurry.
Seaweed
Collect in mid winter and place a mulch on top of one of the other organic mulches. Seaweed on its own is an excellent source of trace elements and nutrients but breaks down too fast to smother weeds effectively.
Non – Organic mulches.
Stone and gravel.
A useful if expensive mulch to keep down weeds but better use cardboard or newspapers underneath.
Plastic and Carpet Mulches
Black plastic and old carpets are a very effective weed mulch but plastic will over time kill all living creatures in the soil. While the growth for the first few years is excellent because of raised soil temperature and reduced competition, in time, the loss of the earthworms and other beneficial insects causes terrible damage to the soil structure and many plants will die off. The best policy is to remove the plastic as soon as the hedge is growing strongly, generally after the second year.